
How to Create a Webinar Registration Form

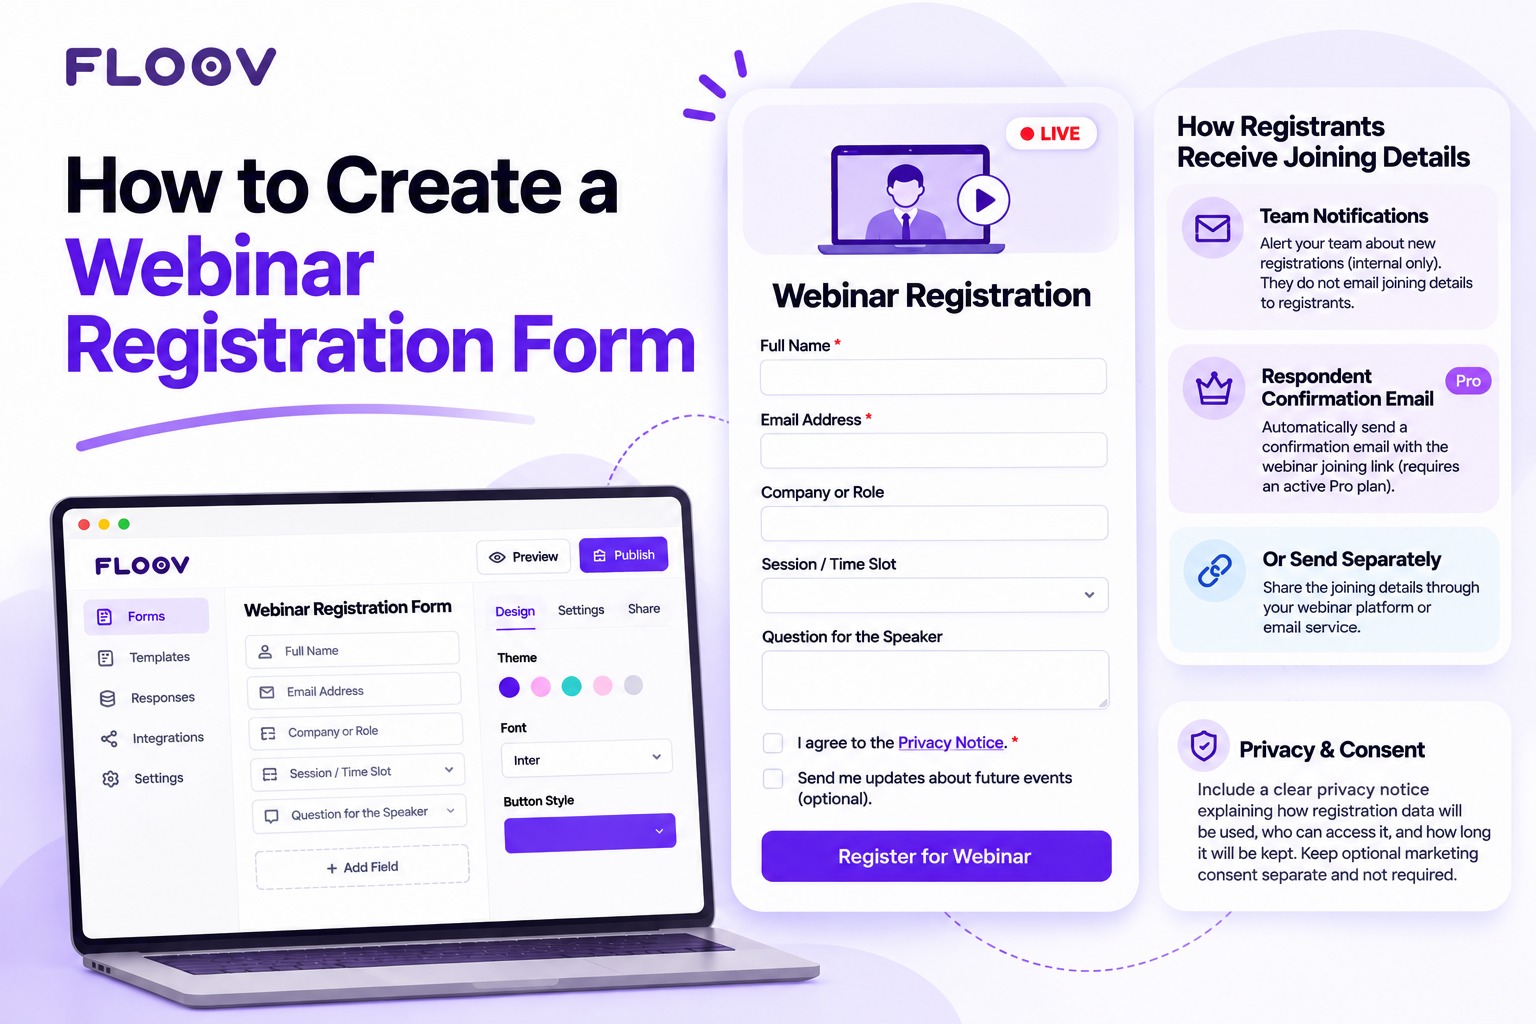
A webinar lives or dies by its signup list. And yet plenty of hosts still collect registrations through DMs, comment sections, and a hopeful “email us to join”. You can guess how that goes. Names end up scattered across five places, nobody knows the real headcount, and the reminder email never happens because there’s no clean list to send it to. On the day of the event, half the audience is a mystery.
One small form fixes most of this. Every signup in one place, the same details from everyone, and a list you can actually work with before, during, and after the event.
What a Registration Form Does for Your Webinar
Picture a small front desk sitting in front of your event. People walk up, drop their name and email, maybe answer a question or two. What you get back is a tidy list - and that list is the whole reason reminders and follow-ups can happen at all.
What To Ask On the Form
Keep it short. Most signups happen in a spare minute, on a phone, and a long form kills that moment. Most webinars need:
- Full name - so you know who’s coming
- Email address - the one truly non-negotiable field, since the joining link goes here
- Company or role - useful for B2B events and tailoring examples
- Session or time slot - if the same webinar runs more than once
- Questions for the speaker - collected early, so the Q&A is never empty
- How did you hear about this - one dropdown that tells you which channel works
- Privacy notice - explain how registration details will be used, who can access them, and how long they will be retained. If you want to send optional marketing or future event updates, use a separate, clearly labelled opt-in that is not required to register. Explain recording separately and obtain any consent required for it.
Everything else is optional, and honestly, every extra field costs you signups.
Registration Form Examples Worth Copying
Look at real Registration Form Examples and a pattern shows up fast. The ones that convert share three habits: they ask for very little, they spell out what the attendee gets, and they feel effortless on a phone. Take a Sample Registration Form For Seminar or a big conference - you’ll usually spot a session picker, maybe a dietary or accessibility question too. A simple online workshop? Name and email are often enough. Match the form to the event, not the other way round.
How to Create a Webinar Registration Form with Floov
Here’s the whole thing:
- Create a free account. Floov is a Free Online Form Builder with a free forever plan - no credit card asked.
- Start from the template or AI. There’s a ready-made Webinar Registration Form template with the standard fields already in place - most hosts only tweak a thing or two. In a hurry? Try Build Form With AI: write one sentence about the event, and Floov hands you a draft to refine. The wider library of Online Form Templates covers feedback surveys and follow-ups for after the event too.
- Adjust the fields. Drop questions you don’t need, drag the rest into place. Form running long? Break it into pages - a light first screen keeps people moving.
- Make it yours. Add the event or company logo, set your colors and fonts. The form should feel like part of the event, not some third-party tool.
- Set up notifications and confirmation emails. Floov can notify your team whenever someone registers, so you can keep track of new signups. However, team notifications are internal and do not send webinar joining details to attendees. If you want attendees to receive an automatic confirmation email containing the joining link, you need Floov's Pro plan. Alternatively, you can send joining details separately through your webinar platform or email service.
- Publish and share. Add the form link to your invitation or embed the form on your event page. Floov forms adapt to mobile screens, so attendees can register from their phones. Decide how joining details will reach registrants: include clear next steps on the form’s ending page, send the link separately through your webinar/email platform, or configure a Pro respondent confirmation email.
Running something bigger, with multiple sessions or days? The companion guide, How to Create an Event Registration Form From Scratch, goes deeper on that.
Getting People to Actually Show Up
Getting names is half the job. Getting those people into the room is the other half. A few things genuinely help:
- Show a clear confirmation. Repeat the webinar date, time, and next steps on the form’s ending page. This confirms that the registration was submitted, but it is not an email containing the joining link.
- Explain how attendees will receive joining details. Tell registrants whether the link will appear on the ending page, arrive in a separate email from your webinar platform, or be sent in a Pro respondent confirmation email configured in Floov.
- Ask a question at signup. Someone who typed a question for the speaker has a reason to show up.
- Watch the list. Floov keeps registration responses in one workspace, where you can search and filter them and export to CSV or Excel. You can also use the Google Sheets integration to send each new registration response to a row in your selected spreadsheet.
Frequently Asked Questions
Common questions about the topics covered in this article.
Create a free Floov account and build your webinar registration form using the editor or an available template. Customize the fields and branding, publish the form, then share its link in your invitation or embed it on your event page. Decide separately how registrants will receive their joining details.
Name and email are usually essential for registration. You can also add company or role, a session picker for multiple sessions, and a question box for the speaker. Include a short privacy notice explaining how registration data will be used. Keep optional marketing consent separate and do not make it a condition of registering.
Yes. Floov’s free forever plan lets you build and publish forms without a credit card. You can customize registration fields and branding, then share or embed the form. Team notification emails alert you to new registrations; automatic respondent confirmation emails containing joining details require an active Pro plan.