
How to Create, Edit, and Translate Forms with AI
Use Floov AI to turn a written brief into a client inquiry form, then refine the questions and translate the content for your audience. You can review the generated form and each proposed edit before putting them to use.
This guide follows Northline Studio, a fictional web design and branding agency. Starting with six questions, you will add a budget question, separate contact and project details, and translate the form before publishing. The copyable prompts come from the video, with an adaptable translation prompt for your chosen language.
Watch the Complete AI Form Tutorial
Watch the complete workflow, then follow the steps below with your own business details.
Watch the full tutorial on YouTube.
1. Describe the Form You Need
From My Forms, open Create form, choose Create with AI, and select your workspace. Under Question layout, choose One page for this starting draft.
Give AI enough context to make useful decisions: your business, the purpose of the form, the questions you want, and which answers are required. Naming the answer types and choices makes the brief more precise.
Prompt to copy:
Create a one-page project inquiry form for Northline Studio, a web design and branding agency. Ask for Full name (required text), Work email (required email), Company (optional text), Service needed (required single selection: Website design, Brand identity, Both), Project description (required long text), and Ideal launch date (optional date). Name the page Project inquiry. Include a heading, a short welcoming introduction, and an Inquiry received thank-you ending. Use professional, approachable English.
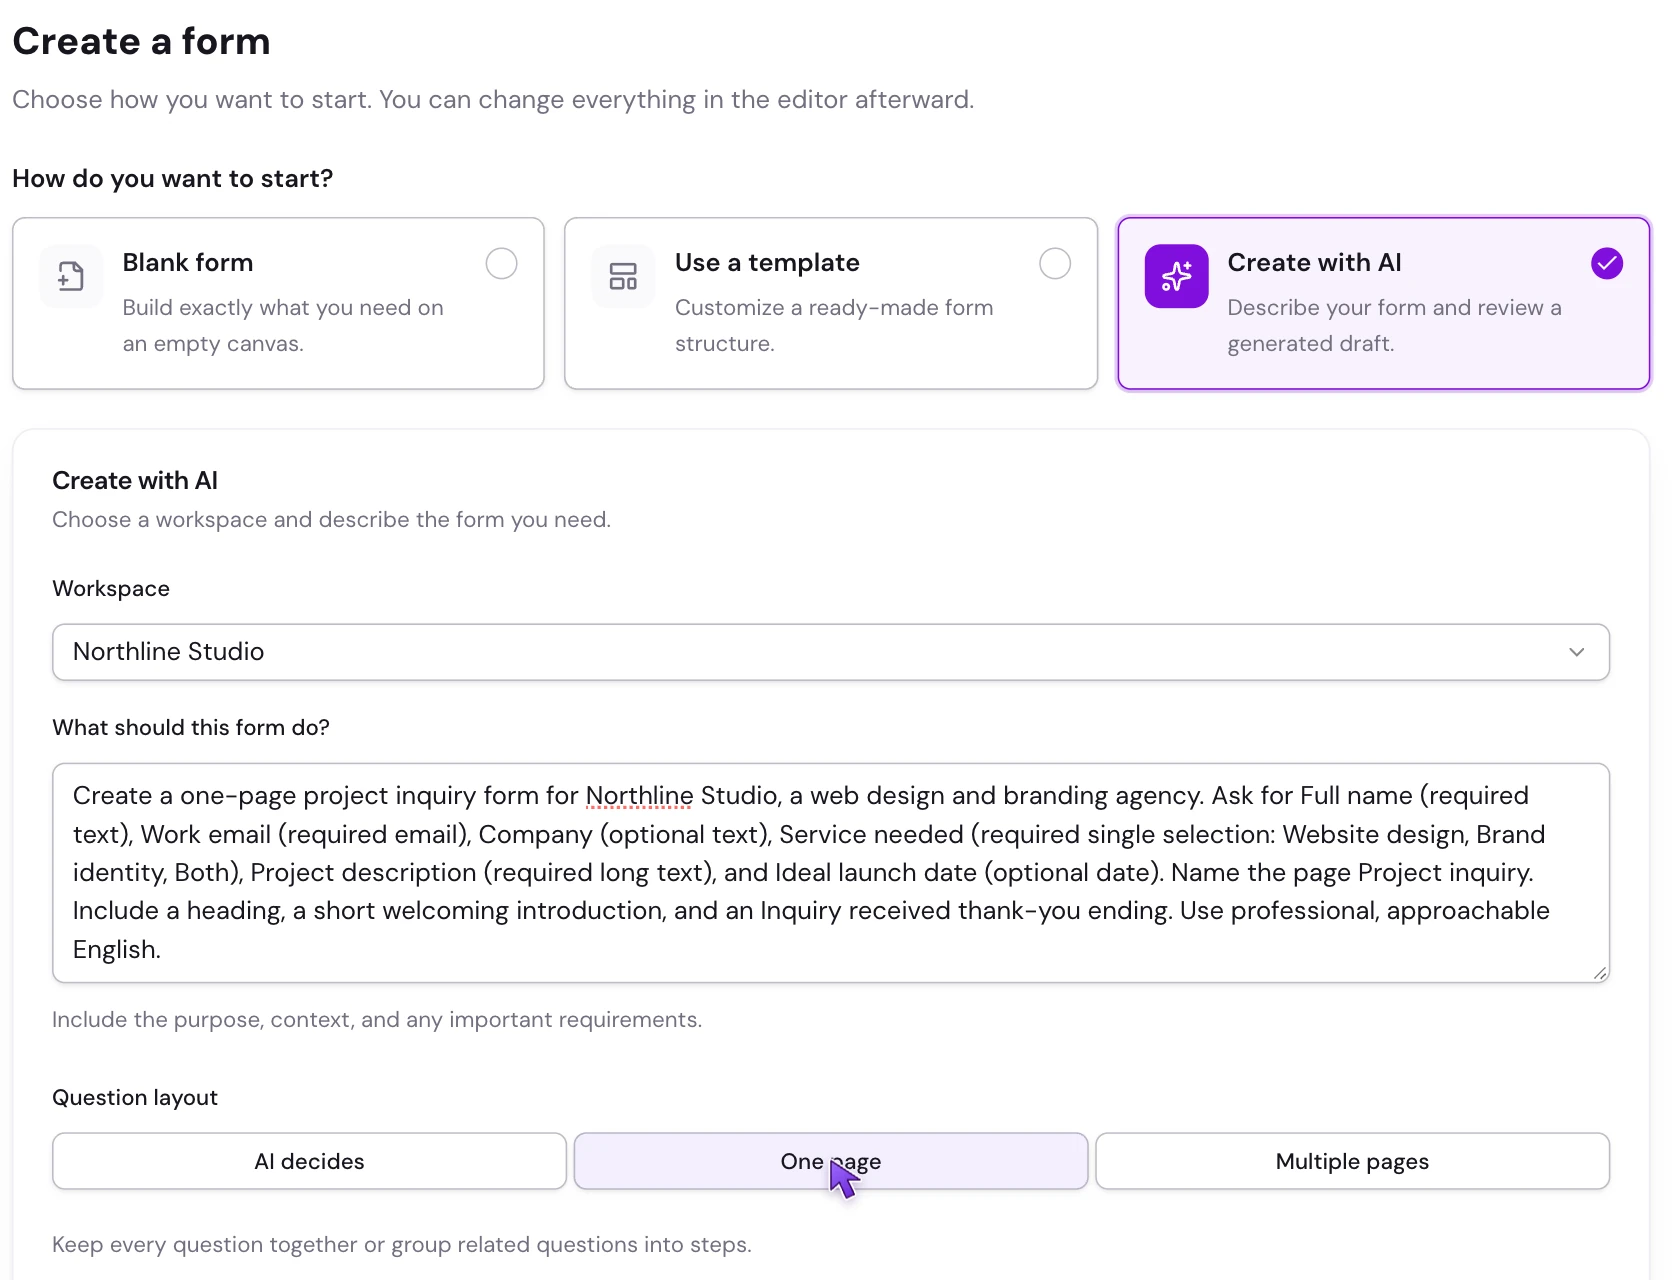
Replace the agency name, services, and questions with your own. Keep the first version focused on what you need to assess an inquiry; you can add detail after reviewing it. Select Generate preview when the brief is ready.
2. Preview the Result, Then Create the Form
Once generation finishes, choose Preview form. Read it as a prospective client: check the welcome copy, field labels, service choices, required questions, and thank-you ending.
The preview is temporary. Choose Create form to add the result to your workspace and open the editor. If you want to revise the brief first, use Edit inputs and generate another preview.
Your generated wording may differ from this example. Keep the useful parts and refine anything that feels repetitive or unclear. See Create Forms with AI for the full creation workflow.
3. Add a Budget Question with AI
The first draft collects a project description. For Northline Studio, a clearer goals question and a budget range make the inquiry more useful when preparing a reply.
With Project inquiry open, choose Floov AI in the editor toolbar. Enter the following request and select Send:
Prompt to copy:
Rename Project description to Project goals and add the instruction “Tell us what you want to achieve and who it is for.” Add a required single-selection question called Project budget immediately after Project goals. Use these options: Under €3,000; €3,000–€5,999; €6,000–€9,999; €10,000+; Not sure yet.
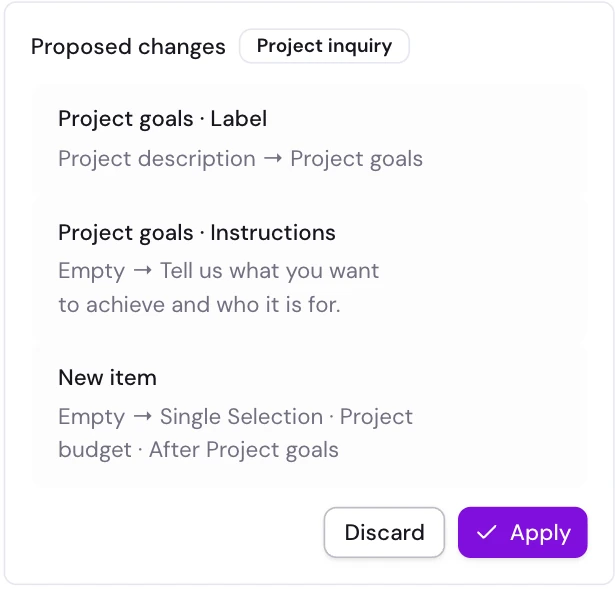
Check the proposal, then choose Apply. Inspect the updated field in the editor, including its required setting and all five options. The ranges give respondents a useful starting point, while Not sure yet lets them answer honestly if their budget is still open.
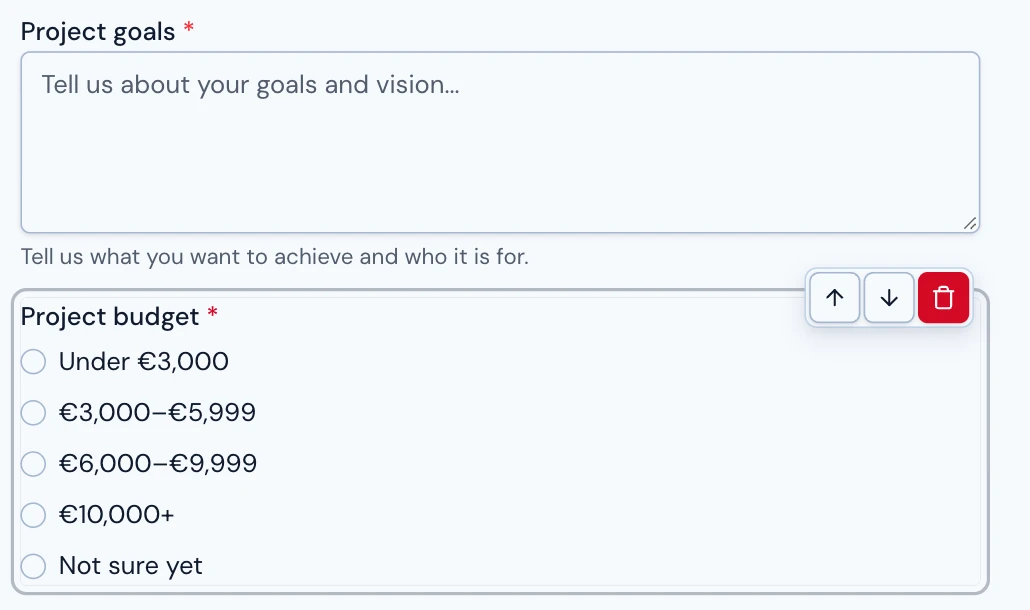
Applied changes are saved to your draft. Publishing is a separate step. You can also make adjustments directly in the visual editor; see Edit Forms with AI for more examples.
4. Separate Contact and Project Details
As the form grows, split it into two focused steps. The first collects contact details; the second asks about the project. In the tutorial, this is done with two requests. First, add the destination page:
Prompt to copy:
Add a new page called Project details after Project inquiry. Give it a heading Project details and a short introduction: Tell us about your project.
Review and apply that proposal, then move the project questions:
Prompt to copy:
Move Service needed, Project goals, Project budget and Ideal launch date from Project inquiry to Project details, after its introduction. Rename the first page Contact details. Preserve all fields and content.
Apply the proposal and check both pages. Contact details should contain Full name, Work email, and Company; Project details should contain the four questions you moved.
Clean Up the Contact Introduction
A page name and its visible heading are separate. Select Contact details and check the heading on the form. In the video, the generated draft also had an extra welcome block. This request updated the heading and removed that repetition:
Prompt to copy:
Change the heading Project inquiry to Contact details. Remove the content block headed Welcome to Northline Studio. Keep the paragraph under the page heading and all questions.
Adapt the request to the headings and blocks in your own draft, then review and apply it.
Set the Form’s Appearance
You can also ask AI to change the design. The tutorial uses this request:
Prompt to copy:
Use the Cobalt theme and Inter font. Make the form 700px wide and turn on the progress bar.
The generated draft already used Cobalt and had progress enabled, so the proposal changed the font and width. Review what changes in your own proposal, apply it, and check Appearance settings for the finished design.
Optional: Let Clients Attach a Brief
This step requires Pro. If clients already have a project brief, let them attach it to their inquiry. Select Project details, then send this request:
Prompt to copy:
Add an optional file upload called Project brief after Ideal launch date. Accept one PDF file up to 5 MB. Add the instruction “Share an existing brief if you have one.”
Review and apply the proposal, then check that the field is optional, accepts PDF files, and has a 5 MB limit. You can skip this step and continue with translation. See the File Upload guide for the available settings.
5. Translate Your Form with AI
Once the structure is ready, ask Floov AI to translate the entire form. Include the pages, ending, questions, choices, and navigation in your request so the intended scope is clear.
Replace [target language] in this adaptable version of the tutorial prompt:
Prompt to copy:
Translate the entire form into [target language], including all content pages, the thank-you ending, question labels, instructions, placeholders, choices, and navigation buttons. Use a professional, approachable tone and set the form language to [target language].
Review the proposal and apply it, then read each page and the thank-you ending. Check service names, budget choices, and instructions in context. This updates the existing form to your chosen language.
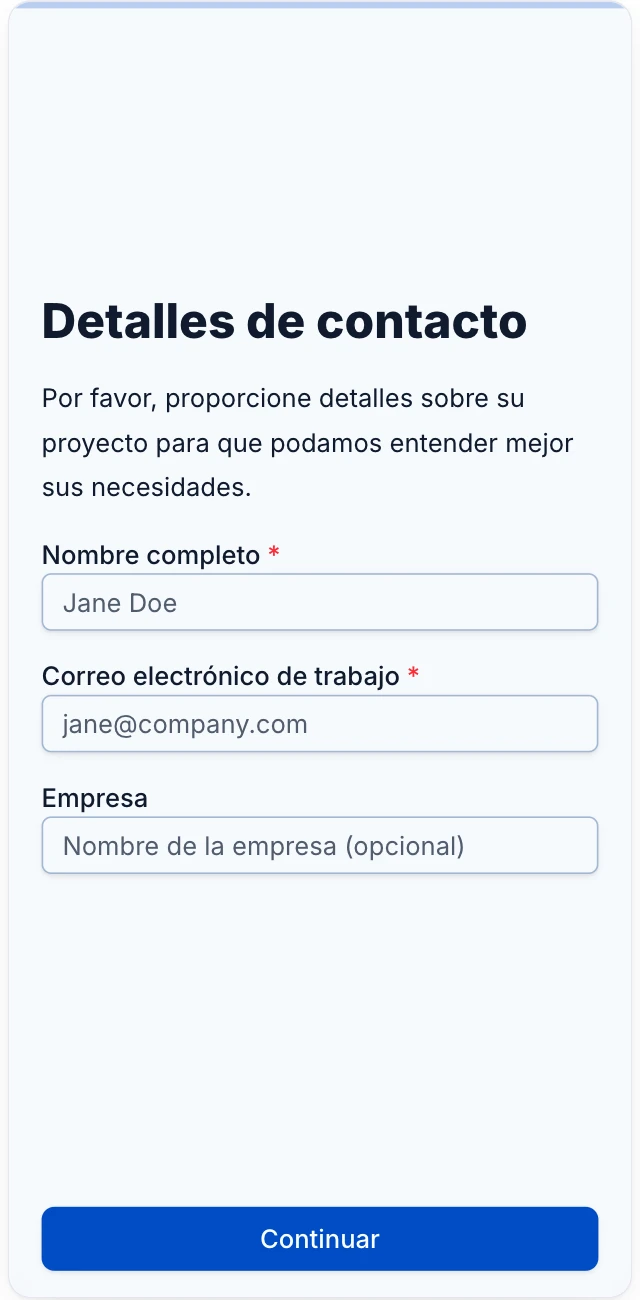
Check button labels in Settings → General. For the two-page Spanish example, the video sets Start button to Continuar and Next button to Enviar. Choose wording that fits your form, then verify the first-page and submission buttons in Preview.
The translation covers your editable form content. Built-in upload helper text and the calendar interface retain their existing language in this example, so check those controls too.
6. Preview, Publish, and Check a Response
Open Preview and check both Desktop and Mobile. Read the translated copy, move through the pages, and make sure all choices and navigation labels are clear.
When the draft is ready, publish it and open the public link from Share. Submit one realistic test inquiry, including a sample PDF if you added the upload field. Then open Responses and inspect the saved answers and attachment.
Confirm that the test inquiry’s contact details, service, goals, budget, launch date, and optional attachment are recorded correctly. See Publishing Forms and Viewing Responses for the details.
Create Your Own Form with AI
Replace Northline Studio’s services and questions with your own, and use the prompts to shape a form that collects the details you need for the next client conversation.
AI requests use credits from the workspace owner’s balance. For current included allowances and top-up options, see Billing & Plans.
Create a form with AI, or explore the Floov AI form builder to see more of the available capabilities.
Frequently Asked Questions
Common questions about the topics covered in this article.
Yes. Choose Create with AI, describe the form and its questions, and generate a preview. Review the result before choosing Create form to add it to your workspace.
Yes. Open Floov AI in the editor, describe the changes, and review the proposal before applying it. Applied edits update the draft; publish when you want those changes to appear on the live form.
Floov AI can translate editable content across all pages and the thank-you ending, including question labels, instructions, placeholders, and choices. The result is one form in your chosen language. Review button labels and built-in control text before publishing.
No. Free includes a one-time allowance of AI credits, and Pro includes a monthly allowance. Requests use credits from the workspace owner’s balance, and the amount varies by request. The optional PDF upload in this tutorial requires an active Pro subscription.